
I bought this terracotta hanging planter at Flora Grubb last November.

I had the idea that I could turn it into a version of this fabulous hanging planter...

Where did I find that wonderful bit of container artistry? I wish I could tell you. I've always collected images I find inspiring. Back in the day I tore them from magazines, then along came Pinterest, and then of course Instagram. I've also taken to just right-clicking and saving images to a file. That's what I did with that one, although I also saved a bit of "how to" text: "My water filled clay pitcher with epiphytic mosses and ferns (Davallia sp. and Campyloneurum angustifolium), Rhipsalis campos-portoana and a mini phylaenopsis. To help the mosses find a better hold, I put an old nylon stock over the pitcher." So that's what I did too...

I thought for sure I could find an old nylon stocking I could use for this project (which I tackled in early February), but no! I was actually kind of thrilled that I didn't have any of those torture hosiery left in my drawers, I had to (gasp) go buy a pair, thankfully there was a good color match on clearance.

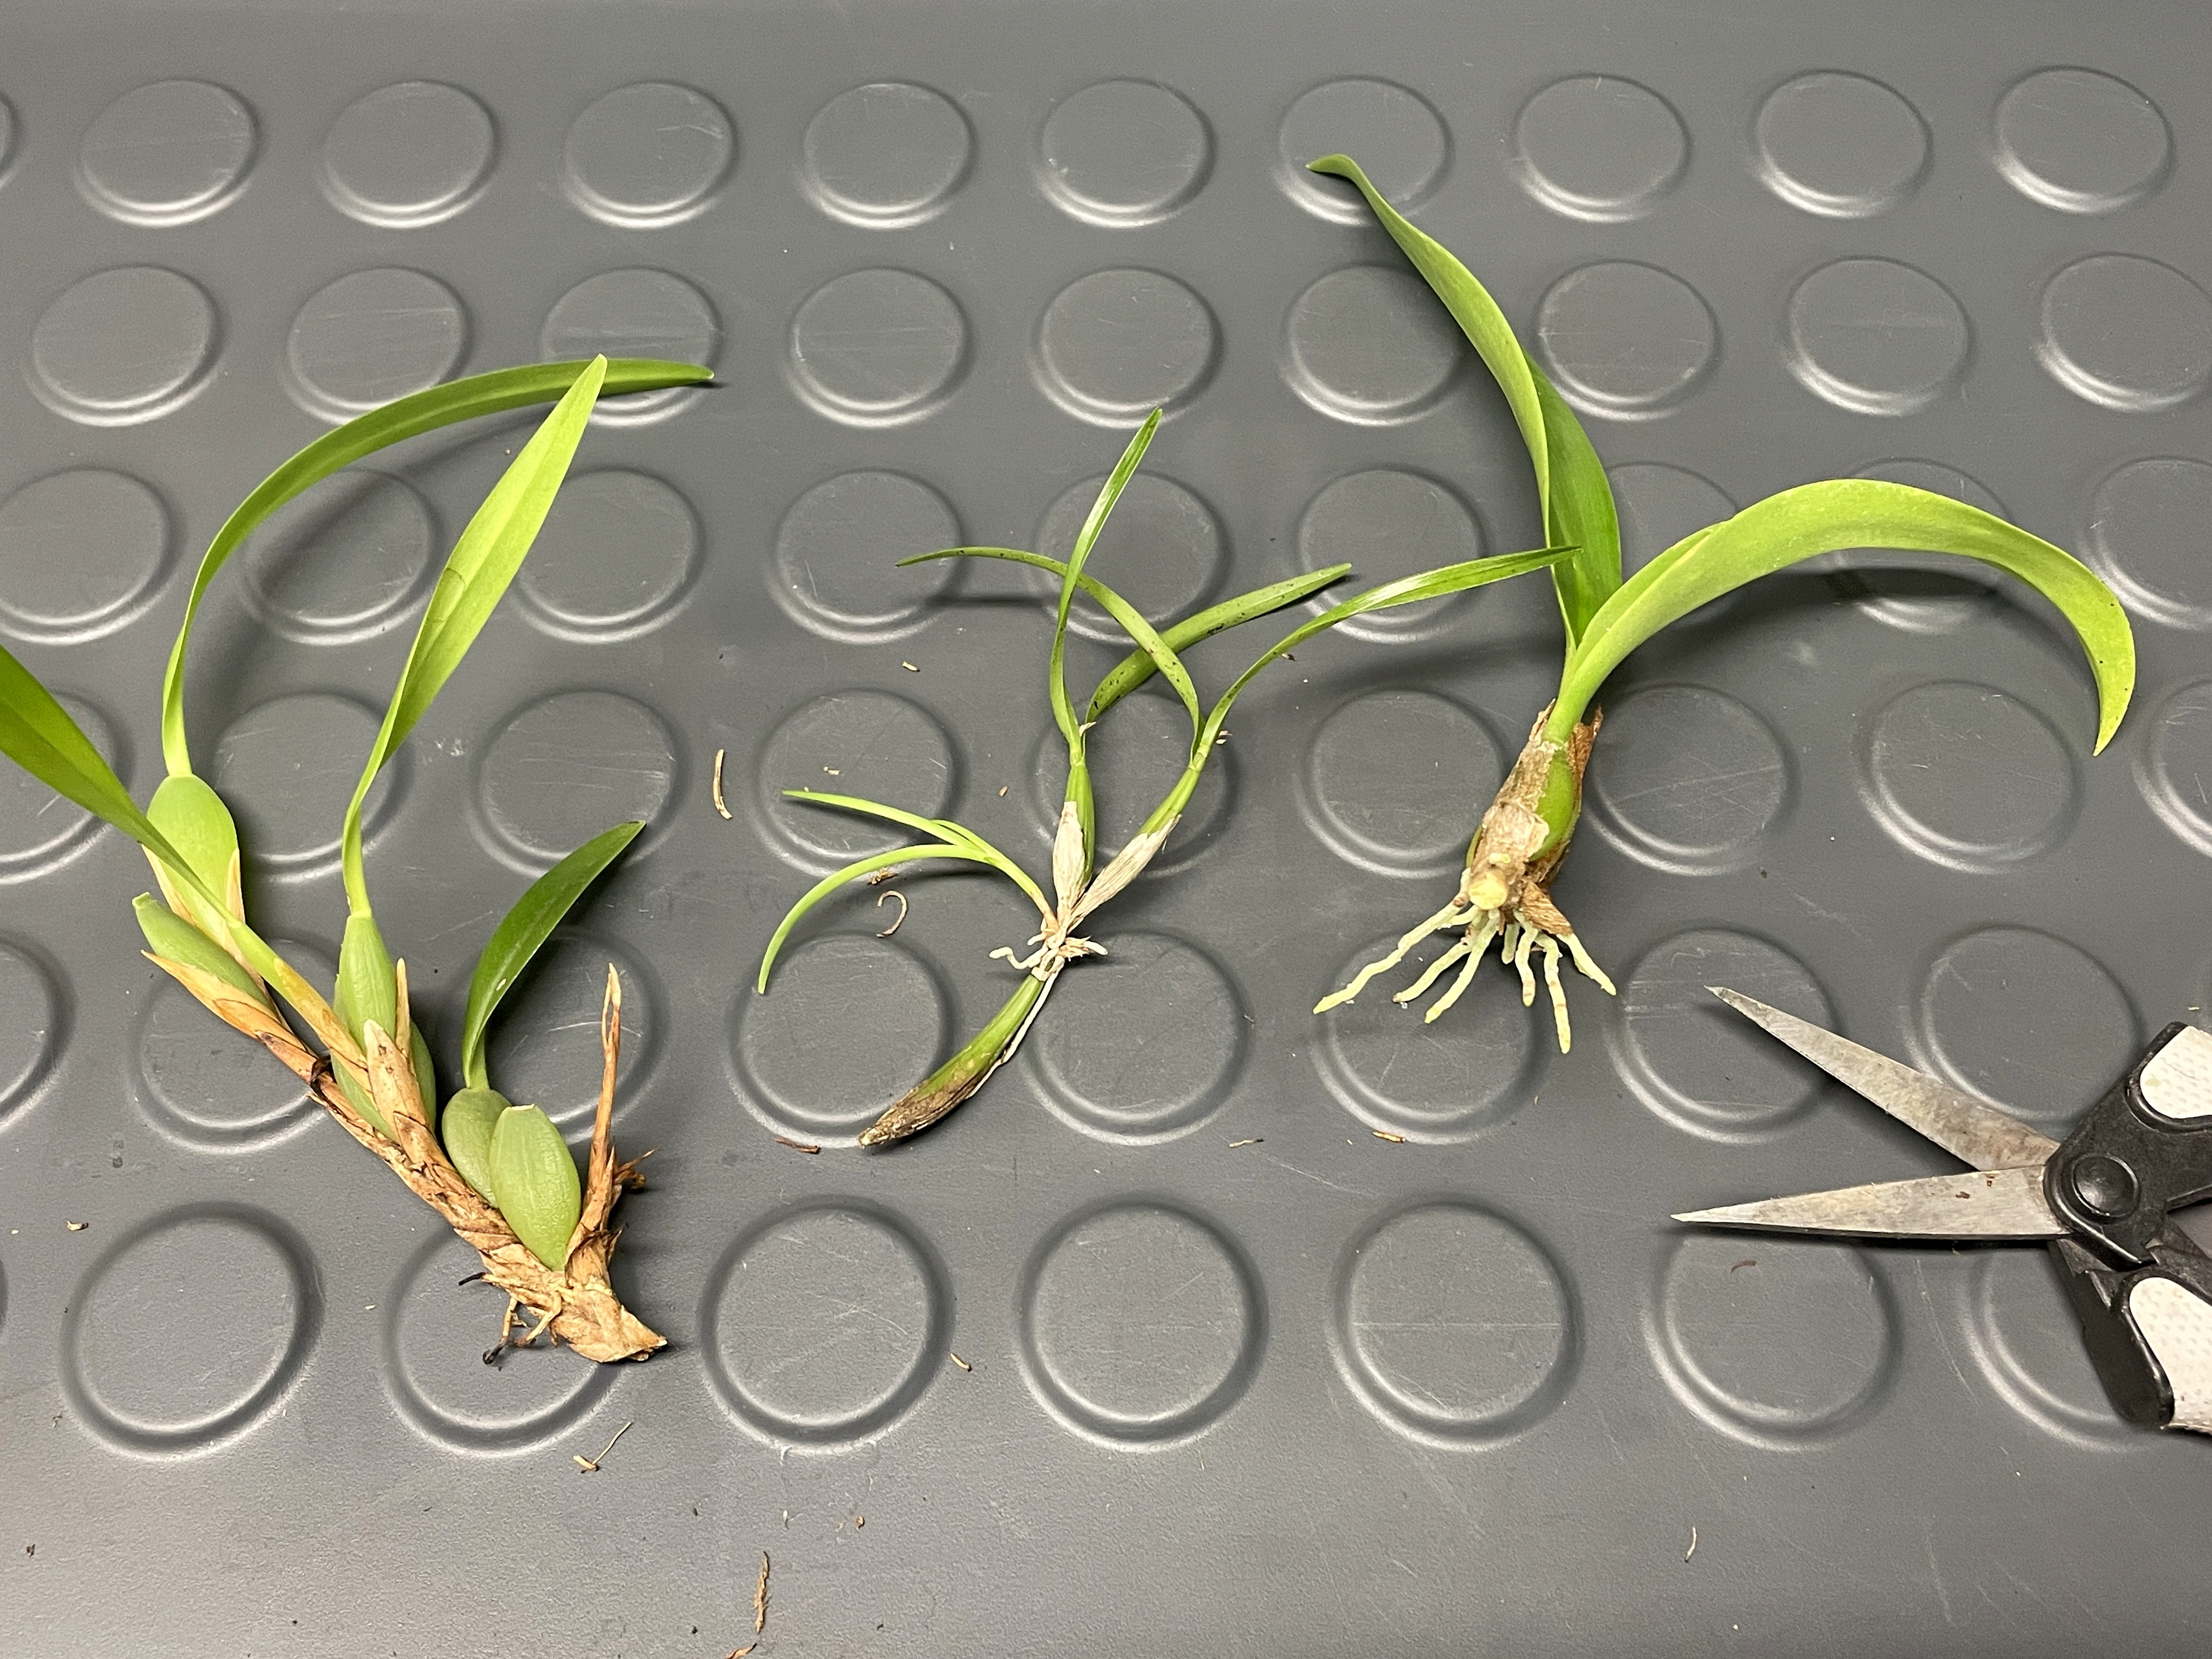
The next step was to take a few orchid cuttings.

I can't find the name of this one, but it's an Andy's Orchids purchase from the NWFG Fest. That's what I cut from it on the far left in the above photo.
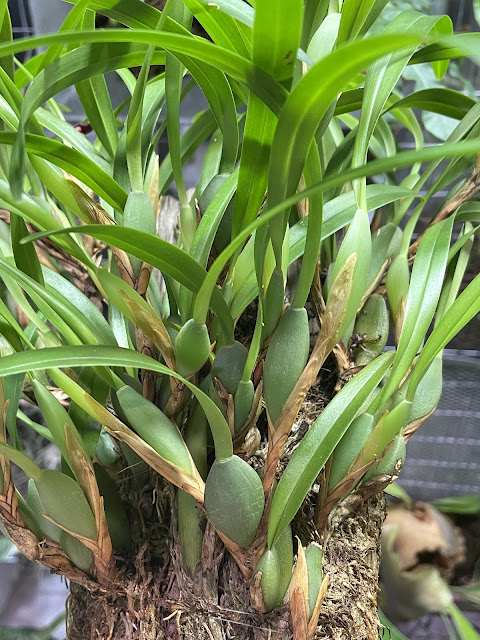
Scaphyglottis-amethystinum (center cutting)

Bulbophyllum saurocephalum (far right cutting)

I soaked and teased Pyrrosia piloselloides off the stick I bought it on (yes, again, from Andy's Orchids).

And worked a piece of Pteris vittata (from my outing to Raintree Tropical) free from the soil it was growing in. Since I saw this fern growing on the side of a fountain, and in several other less hospitable places around the nursery I was fairly confident it would be happy as part of this project.

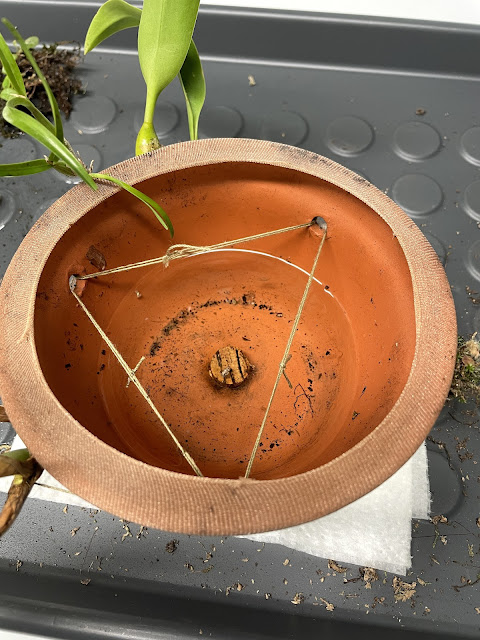
Next, I took advantage of the holes used for hanging the pot and threaded string thru them. On the outside the string helps to stabilize the plants I’d be attaching to the pot. The thread will eventually disintegrate, but hopefully the plants will have grown to become attached to the container and the moss by then. I also put a cork plug in the drainage hole to help the container retain water.


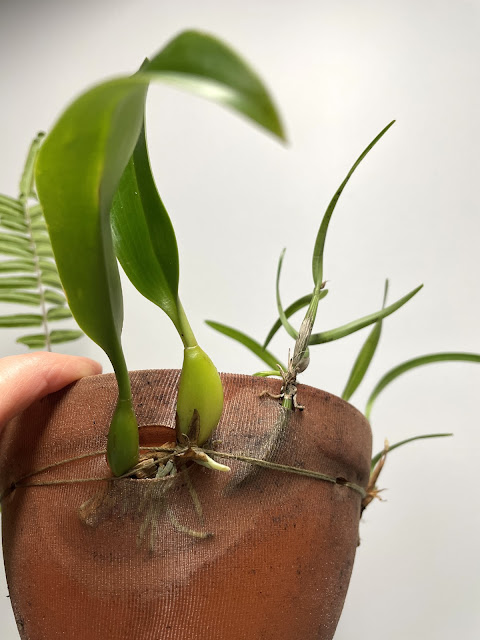
Same for the orchid cuttings.


When I shared a photo of the completed project on Instagram someone asked if I used a moss “slurry.” In hindsight this probably would have been a better idea, resulting in a smoother cover of green, but I wanted an instant moss covering. Unfortunately the pieces I used aren’t all aging in the same way. Live and learn.

Here you can see the different moss types.

And here’s the finished container. I planted pieces of a nepenthes inside the pot, these were unrooted cuttings so I wasn’t sure how they’d do, but since I was experimenting...

I cut the fern back right away once the pieces started to dry. Poor thing went through a bit of a shock getting most of its root mass cut away. Thankfully it started pushing out a new frond a couple weeks later.

After a few weeks hanging in the basement, it’s outside now and doing great (I couldn’t resist adding a couple tillandsia).

Another view…

It’s hanging with several other plants in the branches of the Metepanax delavayi.

Where is it? Right there…

It’s been freakishly dry here for the last month so I’m aiming the garden hose at it and hoping the plants and the moss are all growing and connecting and that this improvised project ends up being a success.


I worked the roots of the pteris (along with a bit of soil) under the nylon and string.


Next, I covered the pot with moss, working in the Pyrrosia bits and securing it all with more string.


To receive alerts of new danger garden posts by email, subscribe here. Please note: these are sent from a third party, their annoying ads are beyond my control.
All material © 2009-2025 by Loree L Bohl. Unauthorized reproduction prohibited and just plain rude.
I like it! I'm amazed by the interesting things you do in your garden.
ReplyDeleteAh, thanks!
DeleteI'm suitably impressed, Loree! Moss is a temporary seasonal factor here but I hope it holds up well against summer's heat in your climate. Your recent 84F temperature has bested anything we've had here thus far.
ReplyDeleteAnd we're doing it again today! (84F) Moss dries up here too, unless it's constantly hit with the hose. We'll see how this does...
DeleteYou may not call it a success yet, but I am!!!
ReplyDeleteYou also answered a burning question I've had for a long time: whether you could still buy these types of stockings :-)
Really? You've been thinking about ladies pantyhose? Hmm...
DeleteThat looks pretty successful to me. What more would you like to see to consider it a success? Freakishly dry, indeed. The watering season has begun already.
ReplyDeleteOnce there is growth on the majority of the plants THEN I will feel like it's a success.
DeleteLooks great. So is there only water on the inside of the pot? You planted only on the outside over or under the hose? Been wanting to do this exact thing to and i love how yours turned out!
ReplyDeleteNo there is soil inside the pot, the nepenthes cuttings were suck in soil. On the outside I only planted under the hose, with the exception of the small pyrrosia which was worked in with the moss layer. Good luck with yours!
DeleteOh, the horror of nylon stockings... not only miserably uncomfortable, but started running before I even left the house! Glad to see those days in the rear view mirror. Sheesh.
ReplyDeleteI admit, I had to look up 'moss slurry'... I have so much moss growing in my garden I can't imaging needing to create more (although I understand the evenness it creates).
I think your project looks grand, love how it's hanging with others on the very useful, graceful, Metepanax delavayi branches. I suppose you'll consider it a success when all plants start growing new leafs?
Chavli
In the days when I worked at Pier One Imports we were required to wear nylons. Can you imagine? Nylons and wicker baskets/furniture were not a good match! Yes... you got it exactly. When there is new growth on the plants (not just the fern) then I'll know it's a success.
DeleteYou are so creative with your thinking and the application, too! I love it and hope you post how it grows on! But I'm not on Instagram often. Facebook is enough to handle!
ReplyDeleteThank you! And I'm sure it will show up a time or two, well, unless things take a turn for the worse.
DeleteFinally a good use for horrible stockings! Torture is exactly correct. I love your new display, well done. The wee frond emerging is so dang cute.
ReplyDeleteIsn't it? So fuzzy. I remember my grandpa would hang his onions to dry in the basement in stockings with knots between each bulb. Seems like another great use, but one I haven't ever had the opportunity to try.
DeleteThis turned out incredible!
ReplyDeleteHey, thanks! Good to know you're still online somewhere. I miss your Insta!
Delete